

DIY PROJECT: Ping Pong Basketball
/At my son's school, they learned about entrepreneurship. They had a "Market Day" where the students could make or create a product and charge for it. They earned money in their class currency, which was redeemable for gift cards donated by the families.
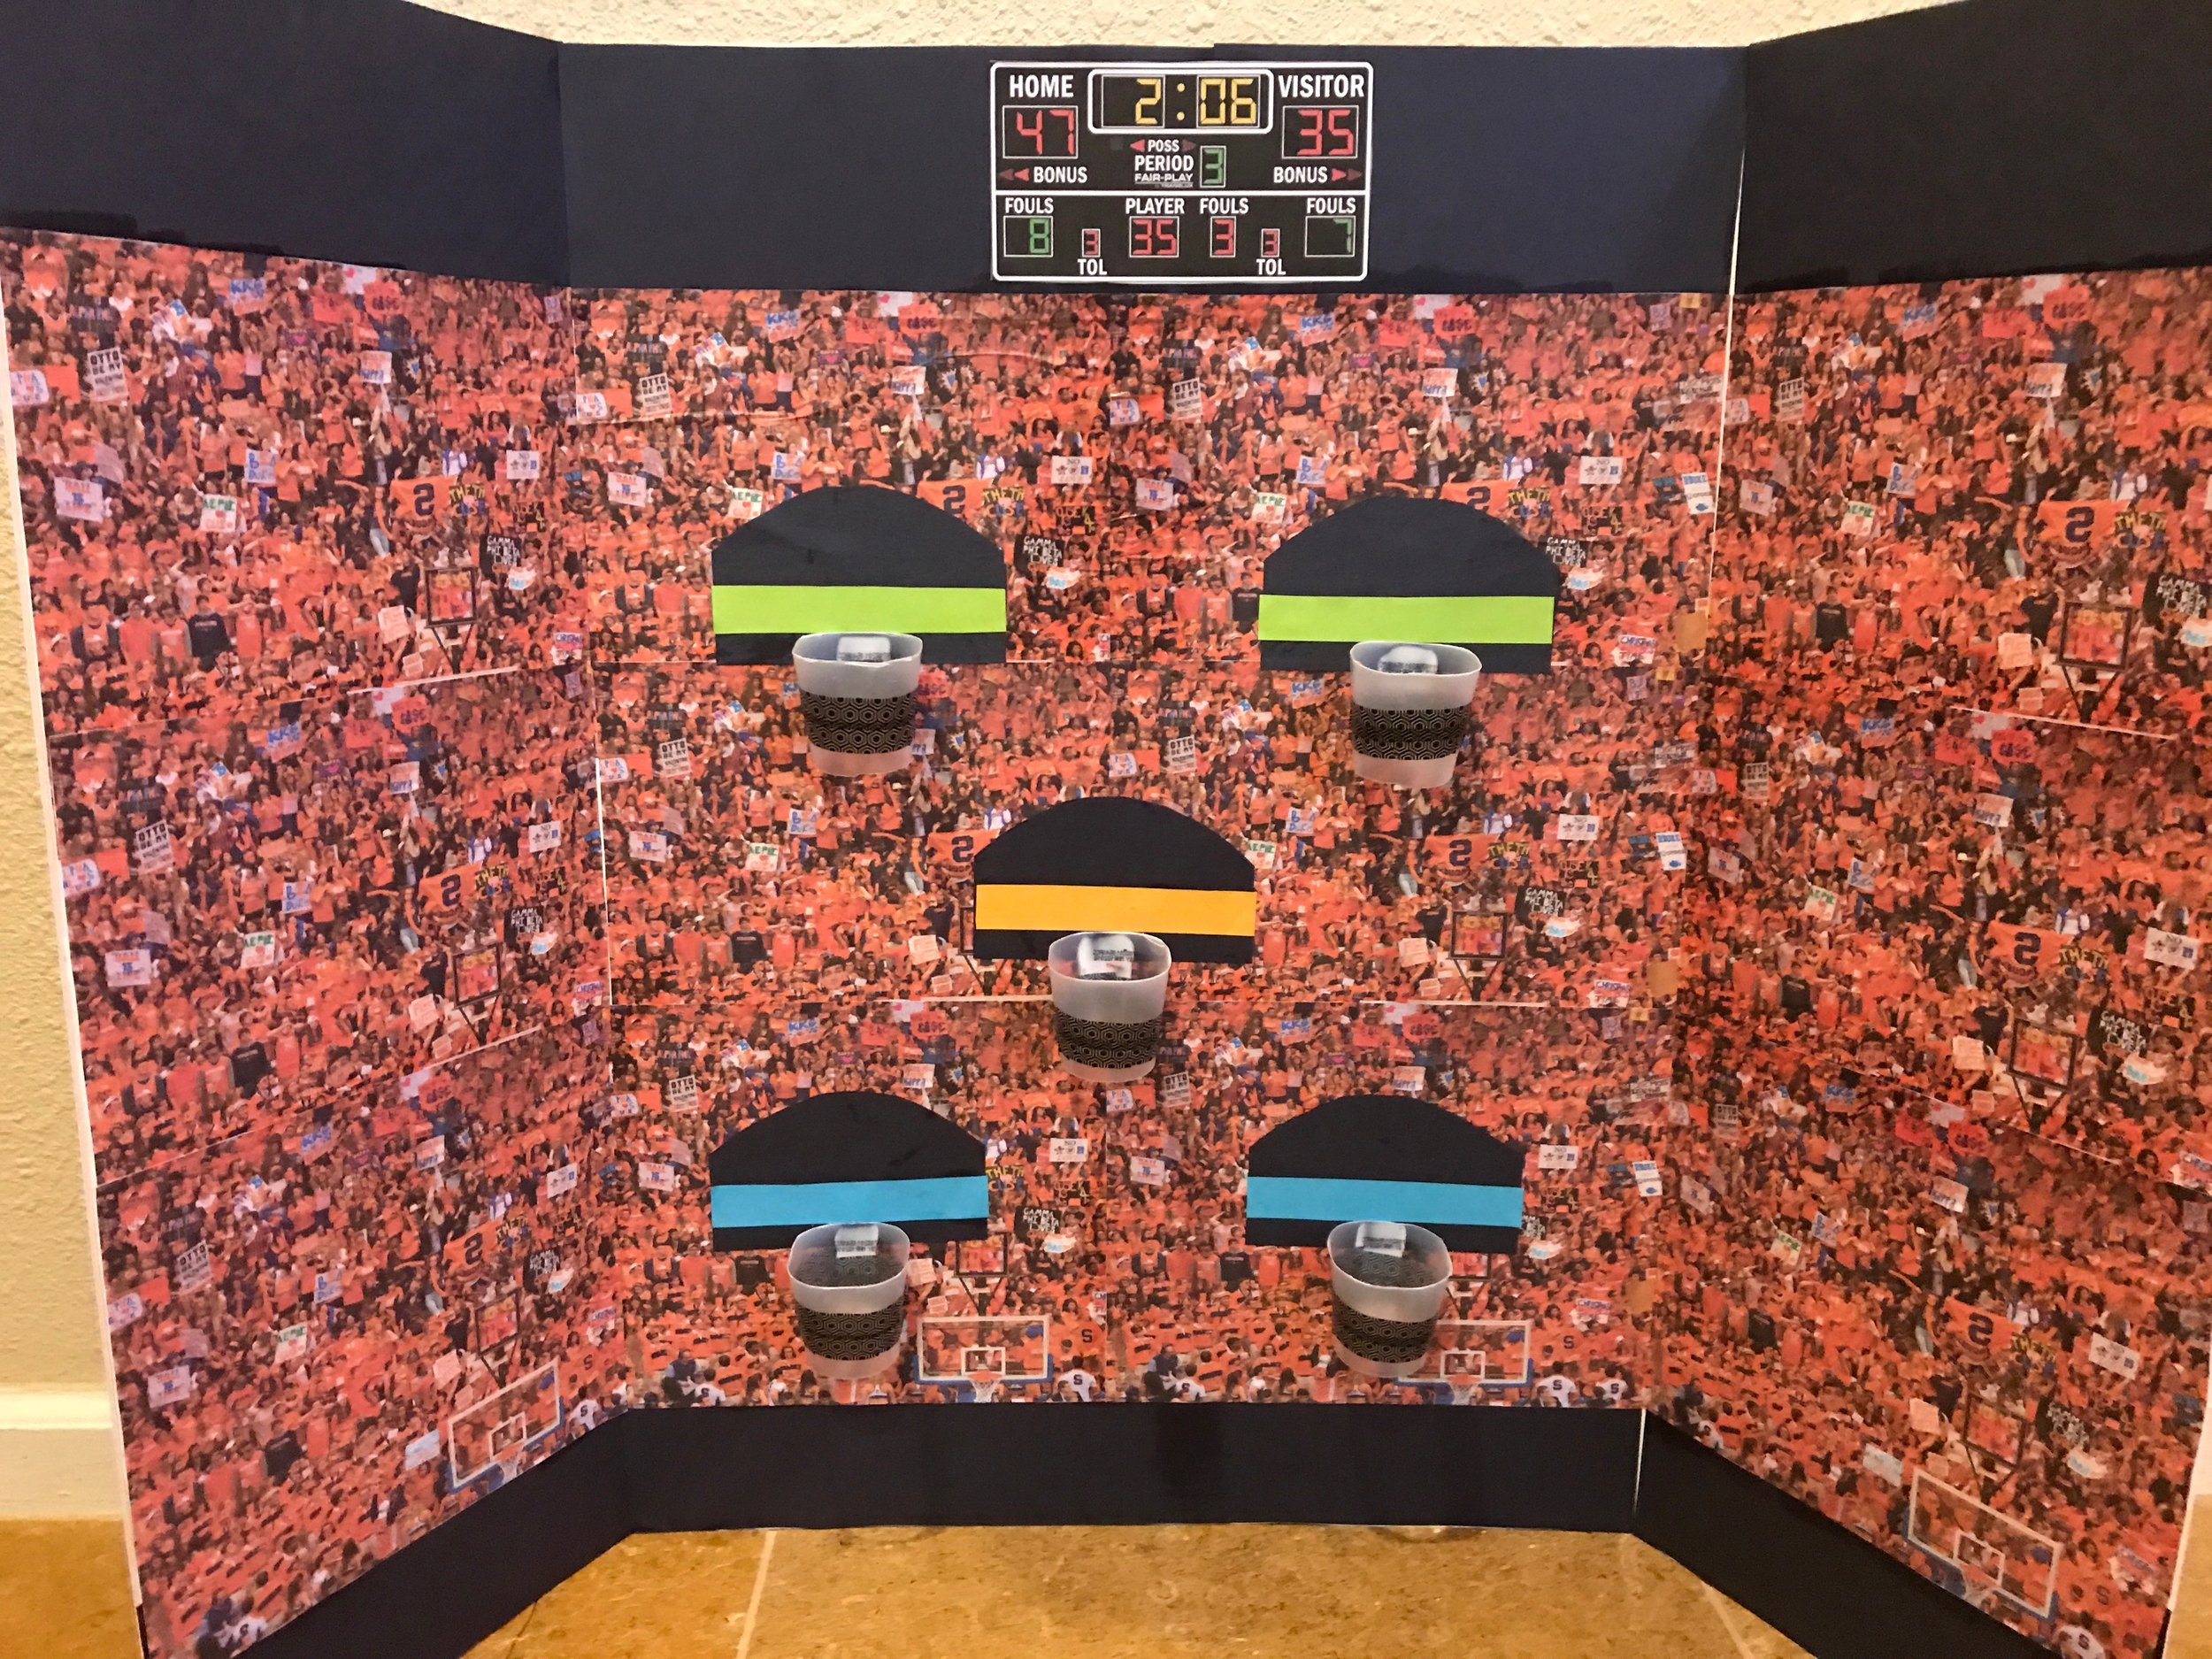
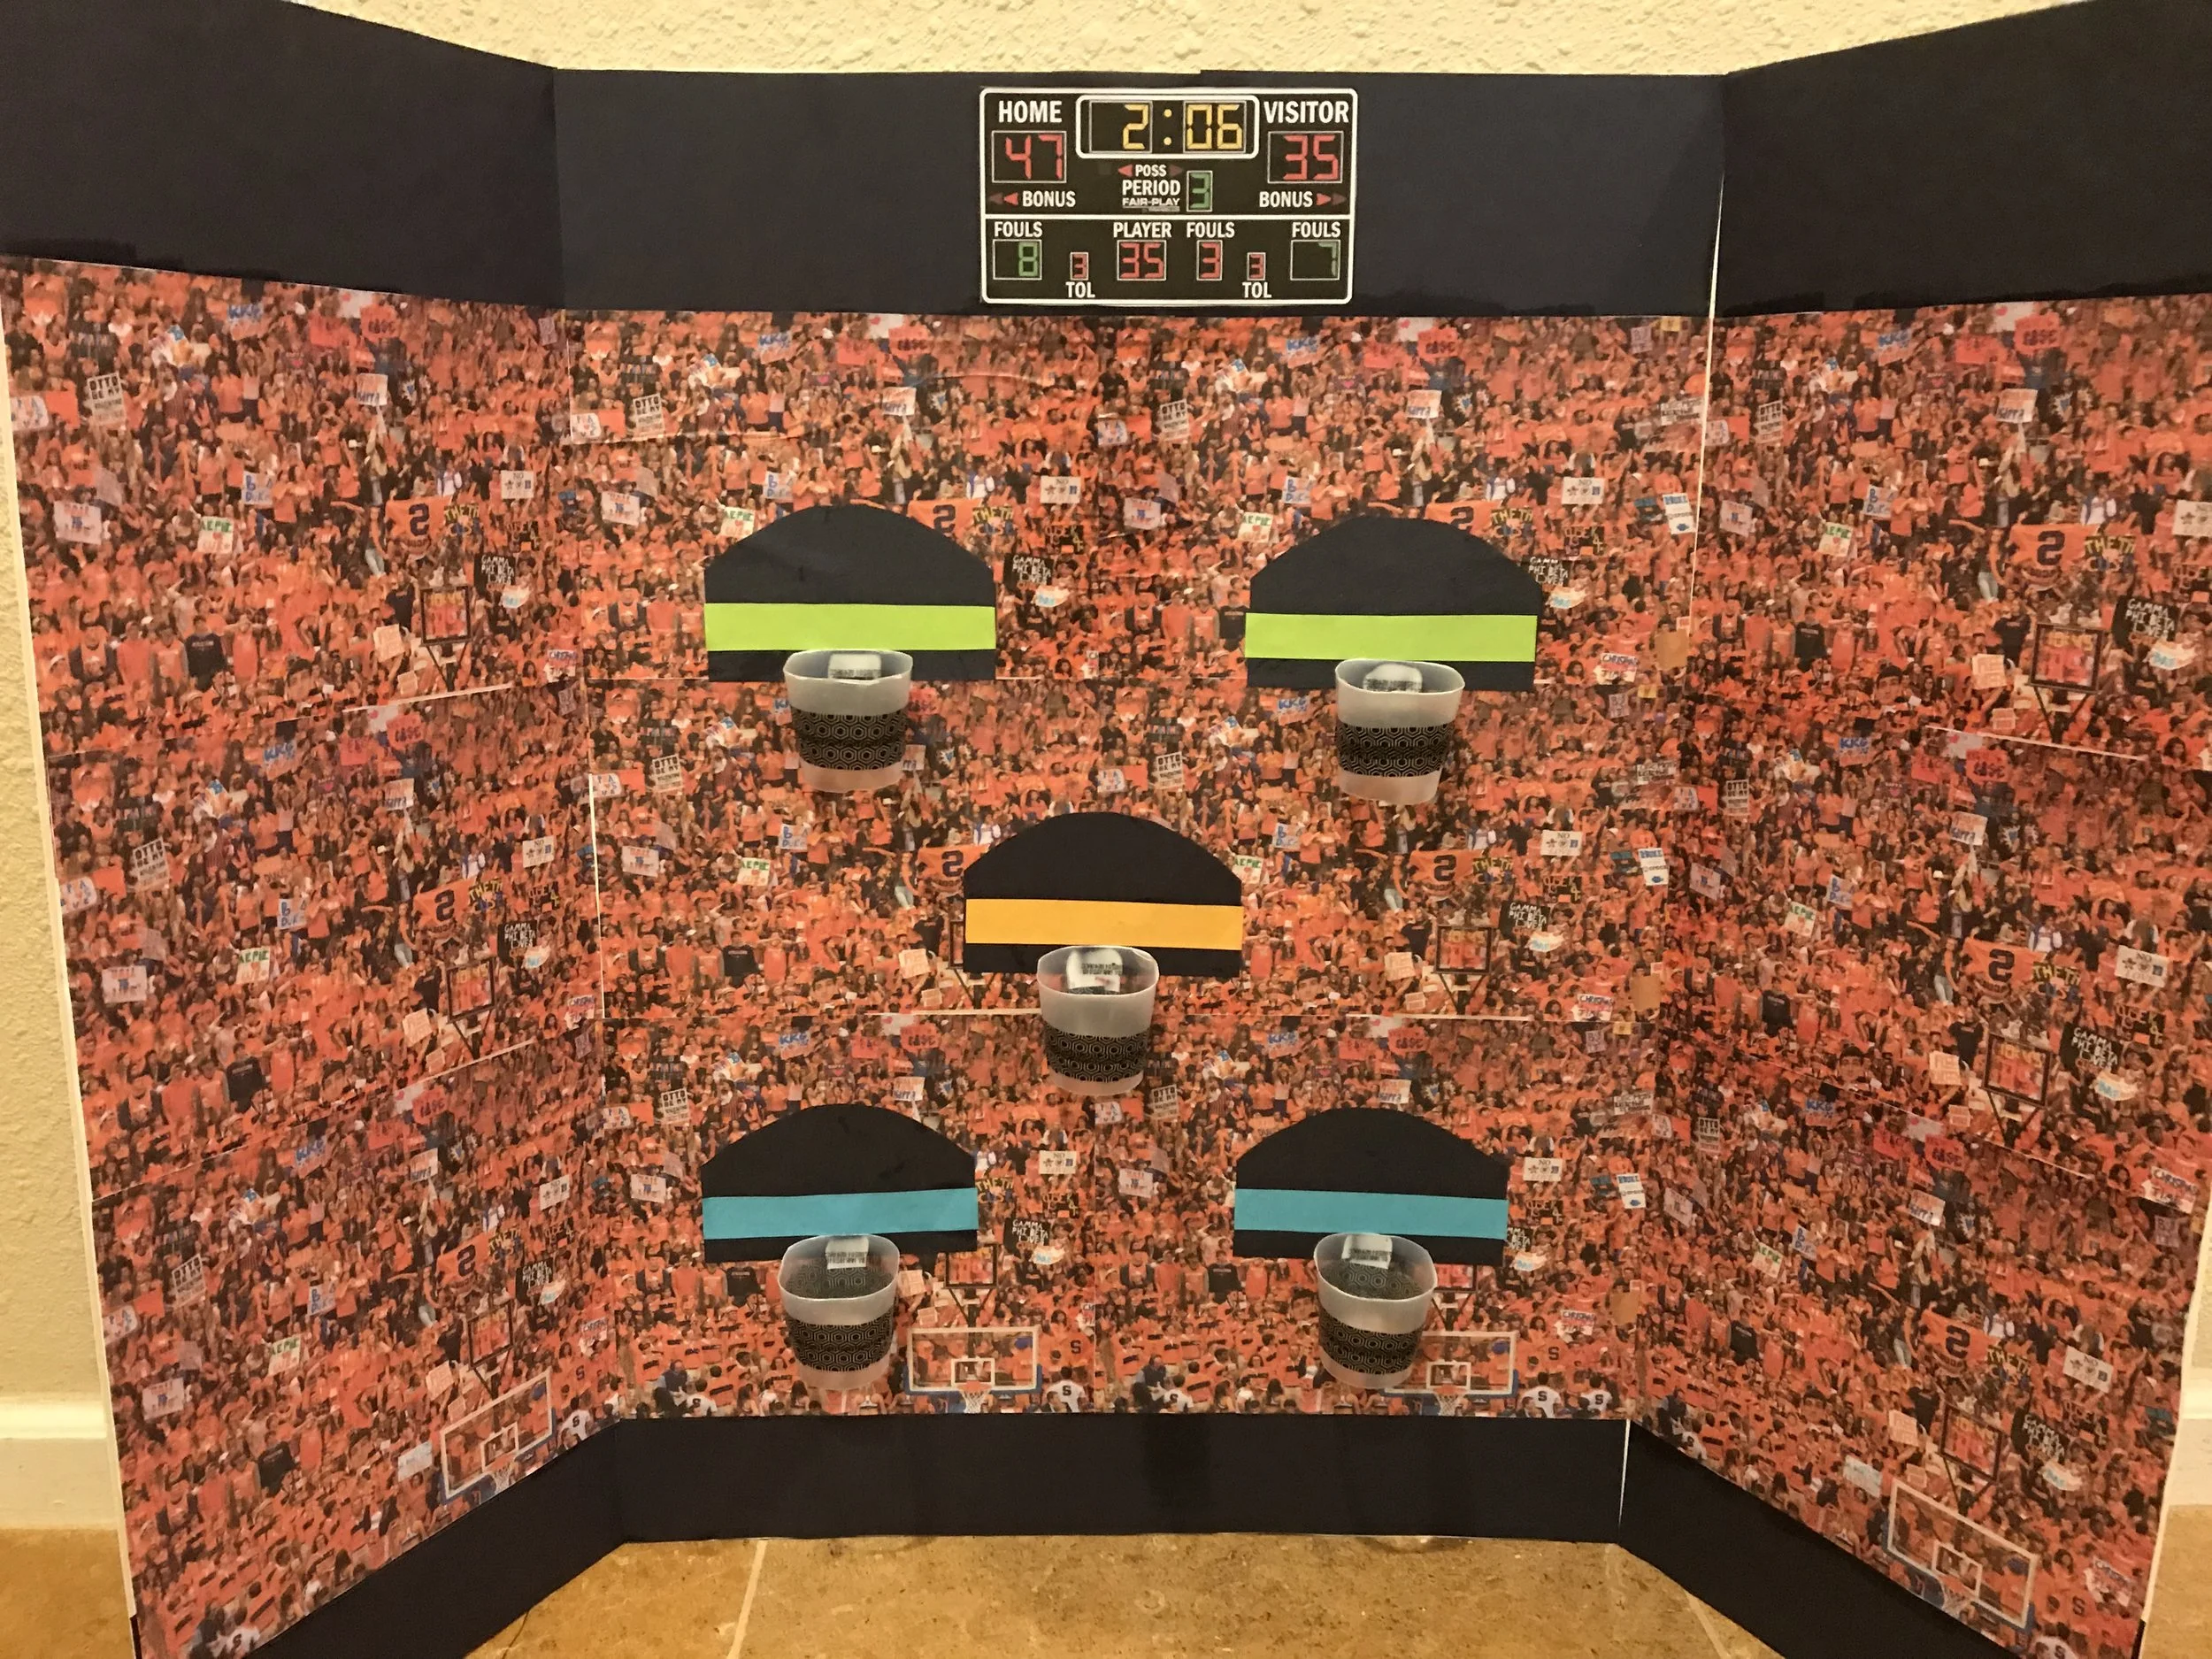
Many of the students brought food (always a good seller), but my son wanted to do something different, so we decided to offer a service: a Ping-Pong basketball game! Credit goes to Holly Lefevre at 504 Main for the idea! Find her original tutorial here: http://www.504main.com/2015/09/diy-ping-pong-basketball-game.html . We followed her DIY instructions and created our own game. Here's our masterpiece:
Here are some simple instructions:
GATHER UP YOUR SUPPLIES:
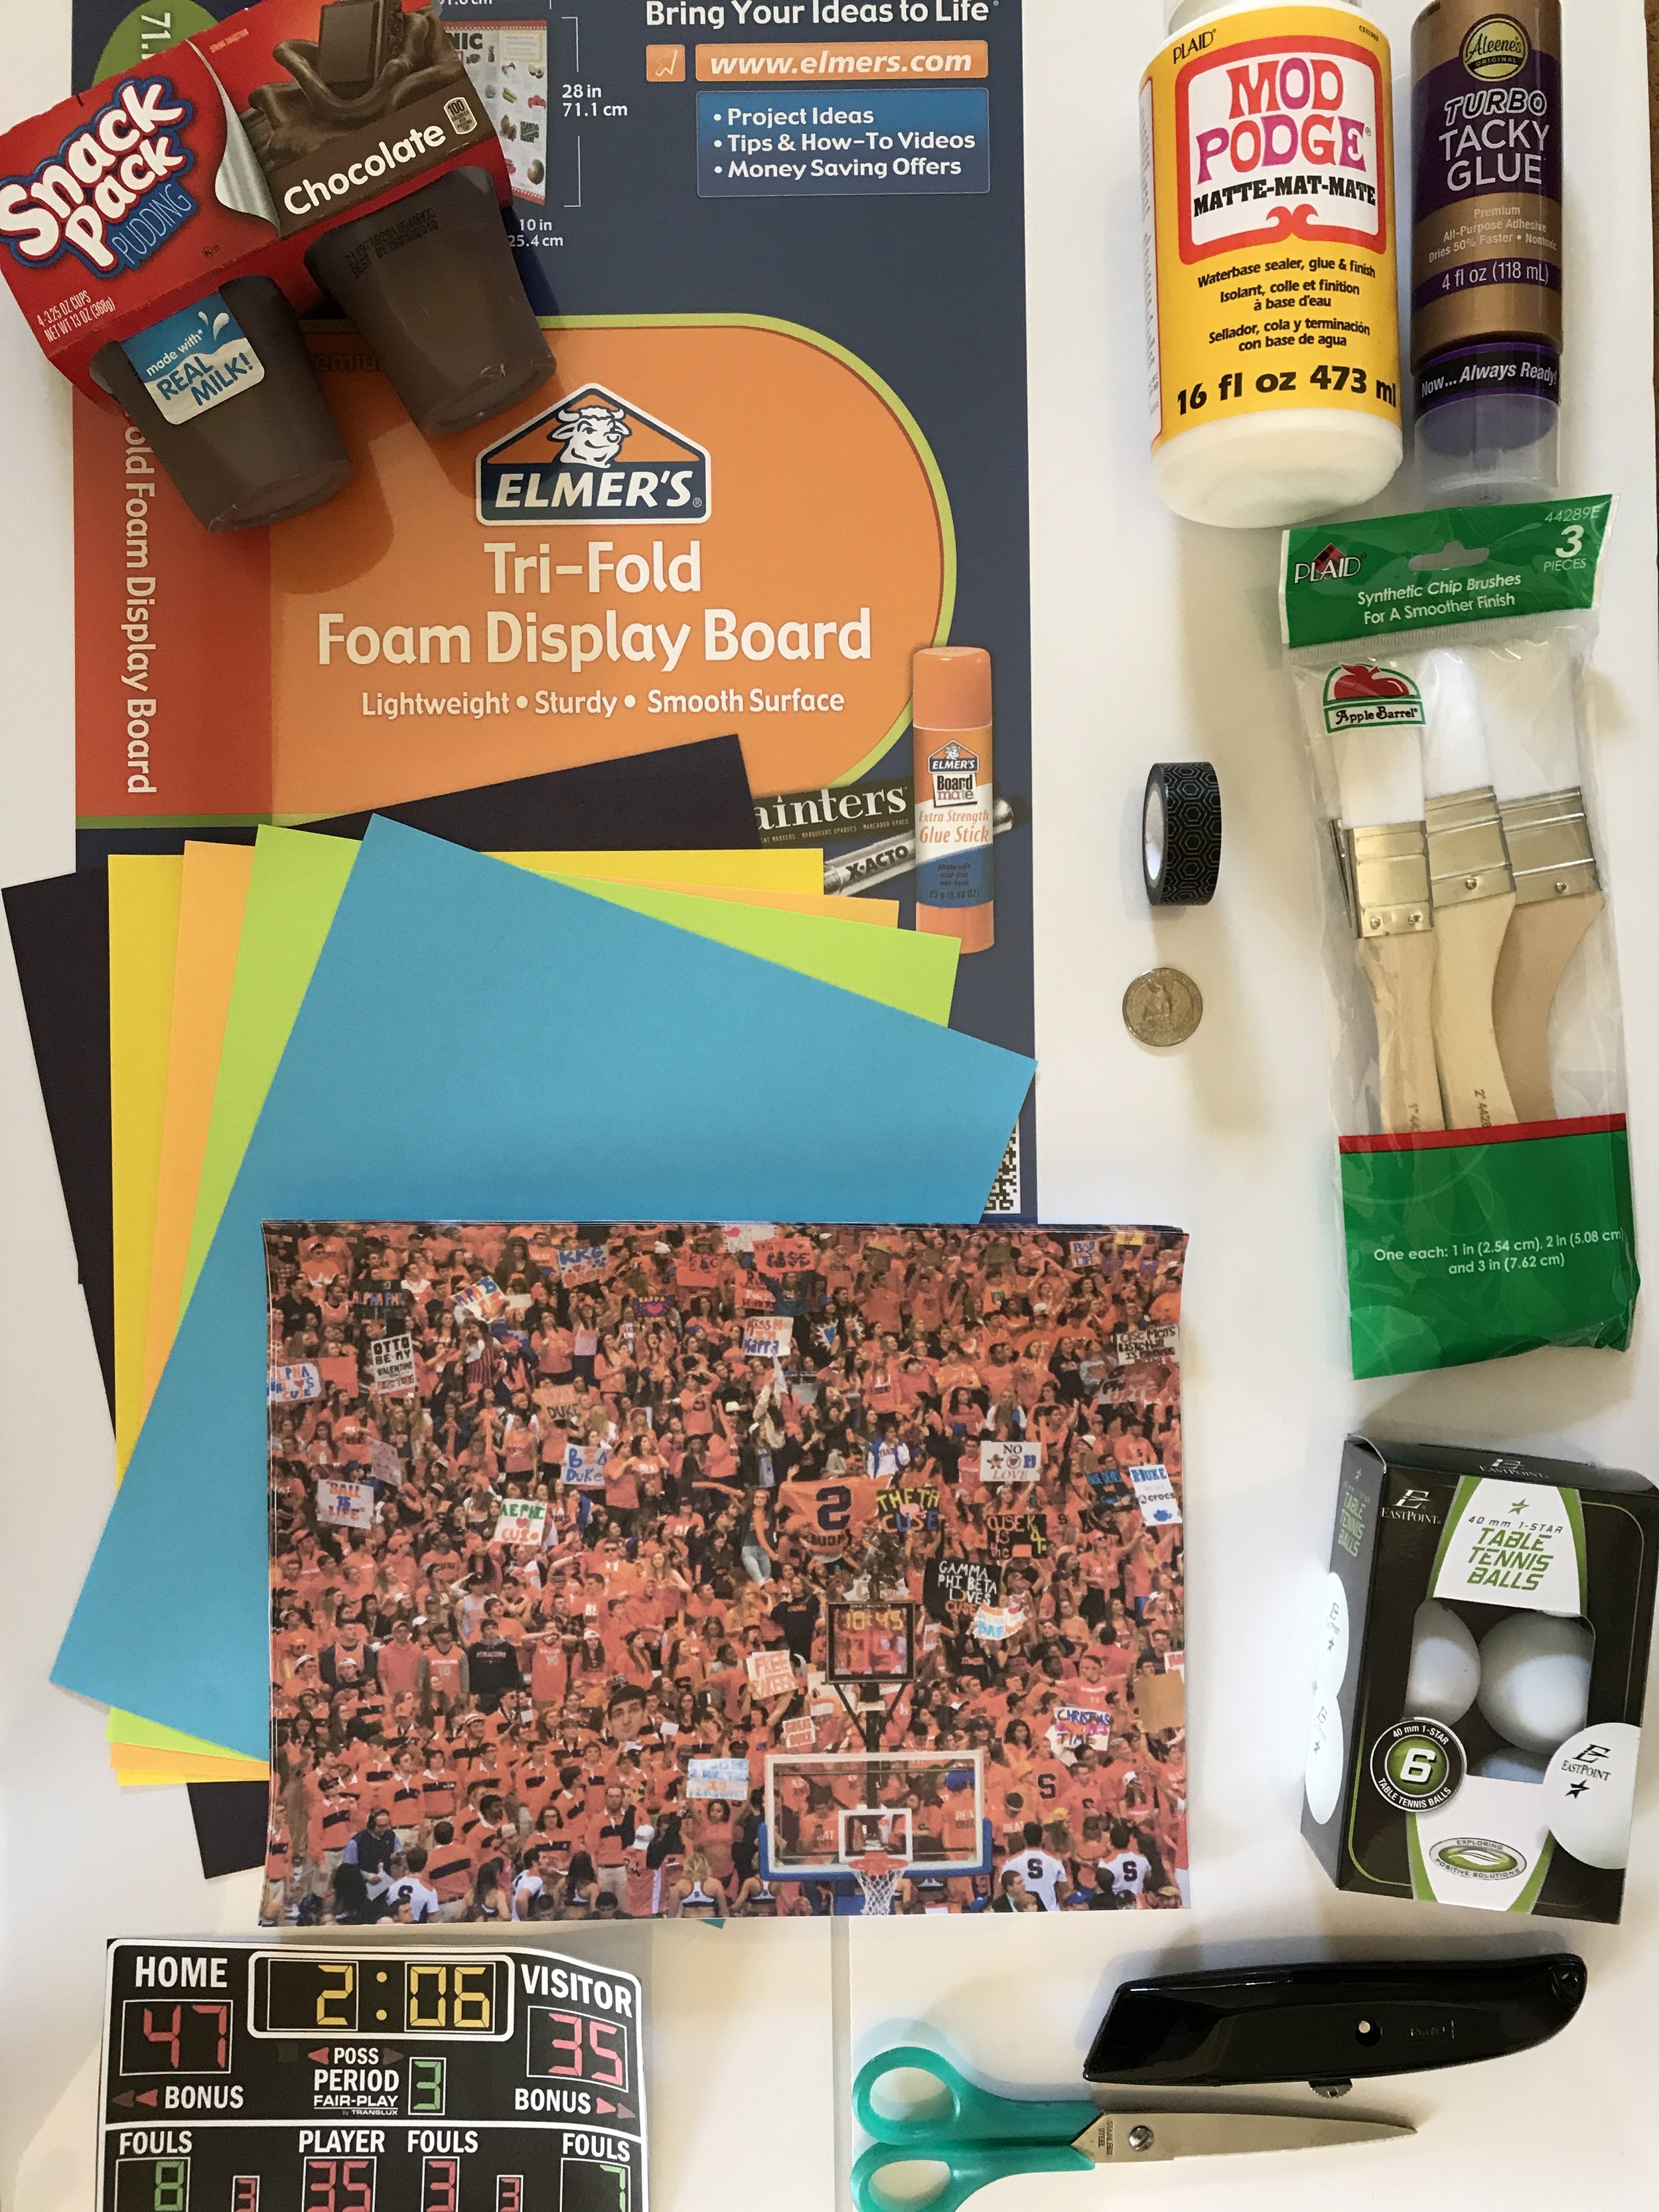
1. Poster Board (Elmer's Tri-Fold Foam Display Board, white, 28" x 40" x 3/16")
2. Mod-Podge (we used the matte one)
3. Aleene's Turbo Tacky Glue
4. Paintbrushes (inexpensive ones we found in the craft aisle at Wal-Mart)
5. 5 Pudding cups (emptied and washed...kids liked this part)
6. Ping Pong balls (Found at Wal-Mart)
7. Scissors
8. Xacto Knife (We couldn't find an Xacto so we used a box cutter)
9. Quarter (optional)
10. Washi Tape (or any kind of decorative tape 3/8" wide)
11. 3 sheets of colored paper (we used blue, green, and orange)
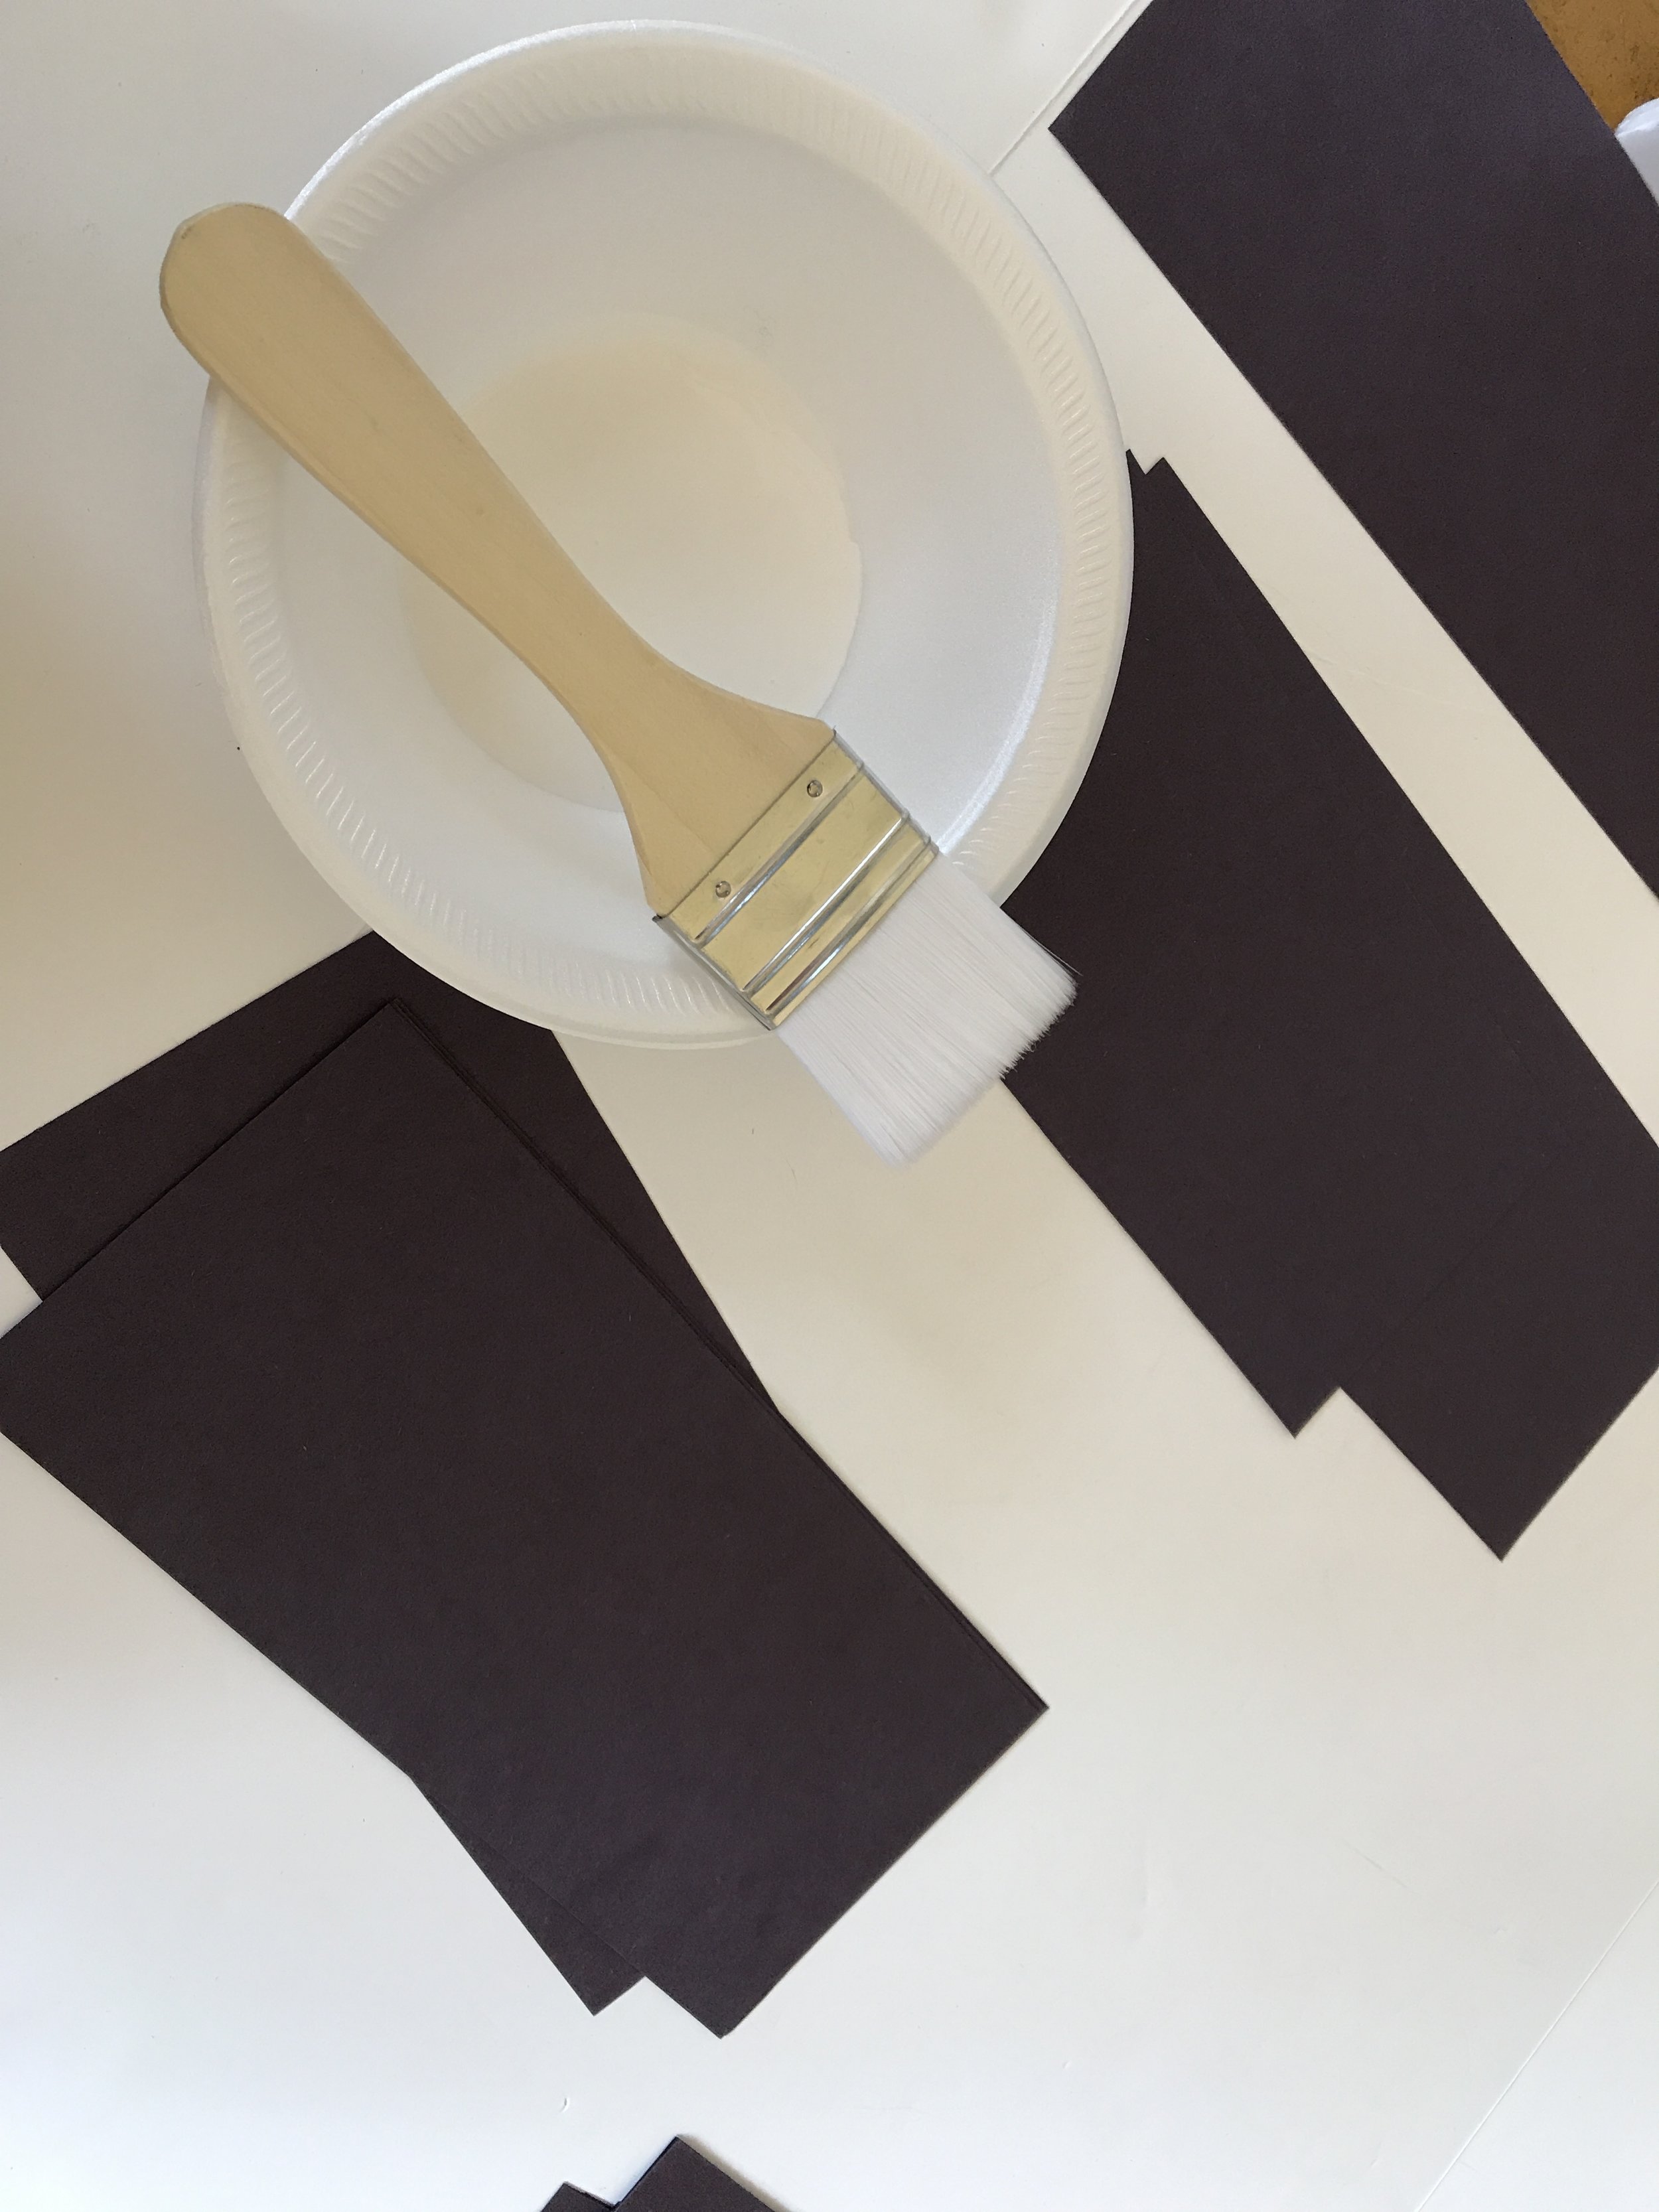
12. 5 sheets of 9" x 12" black construction paper
13. Picture of a scoreboard (found by googling "basketball game scoreboard")
14. Picture of a basketball game audience (found by googling "basketball game audience")
LET'S GET STARTED:
1. Cut four sheets of the black construction paper into strips of 4" x 12". Easiest way: cut off a strip of 1" off the long side of the paper. This will leave you with a sheet of paper that is 8" x 12". Then, fold and cut in half the long way, and you'll have two strips of paper; each measuring 4" x 12". You should have (8) strips.
2. With the remaining sheet of black construction paper, cut out the backboard of each basket using this template from Holly Lefevre at 504 Main. You'll need 5 backboards.
https://drive.google.com/file/d/0B5FBM2oQwPthMFdvODhZQzFoVGs/view
3. Cut out the accent strips with your three sheets of colored paper. Use whatever color combination you want. Each strip measures approximately 1" x 5 1/4". We used two green strips, one orange strip, and two blue strips.
4. Print and cut out the basketball scoreboard.
5. Print several copies of the picture of the basketball audience. You'll need enough copies to cover the poster board; we used 12 sheets.
6. Using the Xacto Knife, carefully cut out the bottoms of the pudding cups.
7. Decorate each pudding cup with 2 strips of washi tape by winding it around the cup.
8. Optional: Using the quarter, cut out 5 circles. This can be used to apply on top of the washi tape on each basket to show the number of points for each basket.
LET'S ASSEMBLE IT:
1. Glue the small, colored paper strips near the bottom of each of the 5 black backboards.

2. Pour out some Mod-Podge in a disposable container. We used a small, foam, disposable bowl. Get out your paintbrush.
3. Place the audience pictures and the 4" x 12" black construction paper strips on the poster board. The black strips are the borders along the top and bottom of the display board. They'll need to be overlapping. You can place the audience pictures either on top of or underneath the black borders (overlapping them as well). We layered them in columns of 3.

4. Once you're satisfied with the look and placement, glue them on. Be sure to glue both the back and front side of the strips and pictures with the Mod-Podge. This will seal them in.
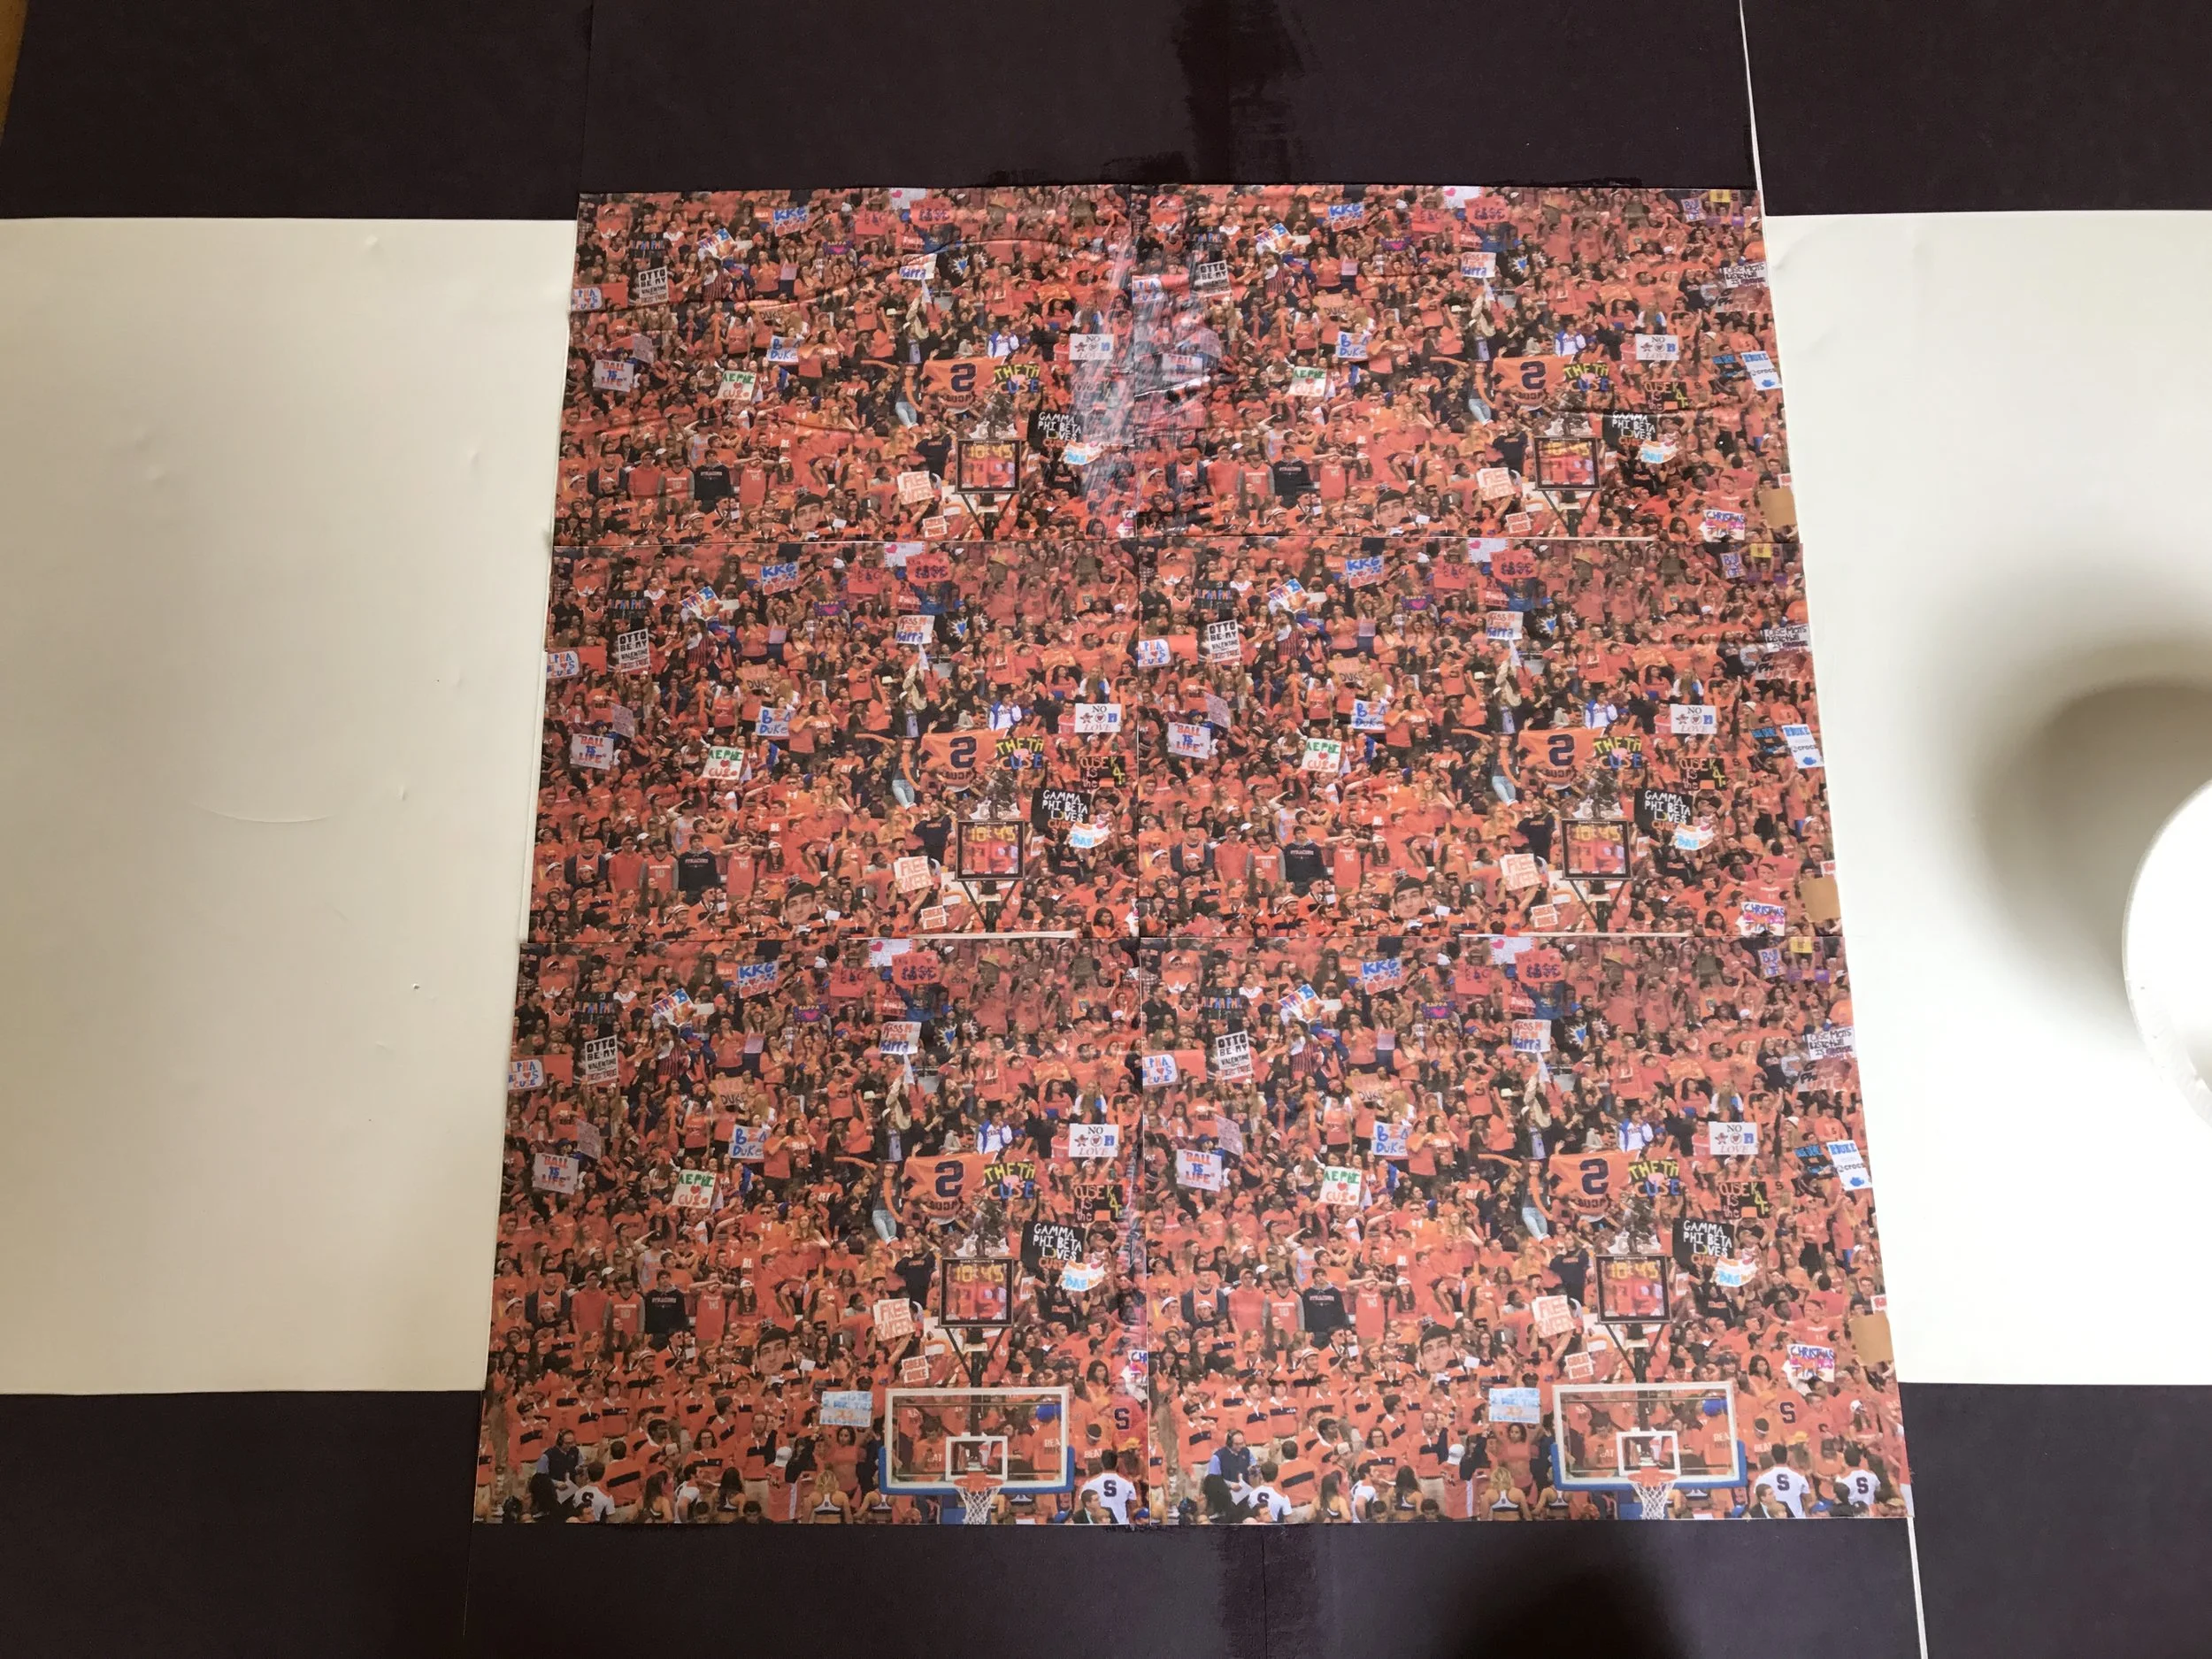
5. You may need (or want) to go over the entire poster board with another coat of Mod-Podge.

6. Once dry, glue on the scoreboard and the 5 back boards.

7. Then, place a large dollop of the Aleene's Tacky Glue on the backs of each pudding cup basket and place on each backboard.
You're done!!!!
Note: 504 Main's original tutorial includes a base. We did not use the base and found that using the Elmer's Display Board was sturdy enough. Also, if you place it against a wall it should be fine (unless, of course, they are launching the ping pong balls against it....lol) . But, of course, the base would make this project much sturdier.